I remember standing in front of my kiln three years ago, staring at a tray of what I thought were “celadon” beauties, only to realize they had turned into a bubbly, streaky mess that looked more like dried oatmeal than art. Most people will tell you that making pottery glazes is this high-level chemistry project requiring a PhD and a laboratory-grade scale, but honestly? That’s a load of nonsense that keeps too many talented potters stuck using the same five commercial bottles. The truth is, once you strip away the intimidating jargon, it’s really just about understanding how different minerals play together in the heat.
In this guide, I’m cutting through the academic fluff to give you the real-world mechanics of recipe formulation. We aren’t going to get bogged down in endless math problems that don’t move the needle; instead, I’m going to show you how to actually build a stable base, how to tweak colors without losing your mind, and how to troubleshoot those inevitable kiln disasters. By the time we’re done, you won’t just be following recipes—you’ll be creating your own signature finishes from scratch.
Table of Contents
Guide Overview
Tools & Supplies
- Digital Scale (for precise measurement of ingredients)
- Sieve/Mesh Screen (for removing clumps and ensuring smoothness)
- Mixing Bucket (plastic container for combining materials)
- Stirring Rod (wooden or silicone stick for thorough mixing)
- Silica/Flint (500g – primary glass former)
- Kaolin/Clay (500g – suspension agent)
- Feldspar (500g – fluxing agent)
- Metal Oxides (50g – colorants like cobalt or copper)
- Distilled Water (1-2 Liters – liquid base)
Step-by-Step Instructions
- 1. First things first, you need to gather your raw materials. We aren’t talking about hobby store kits here; you’re going to need high-quality oxides, frits, and clays. Grab a digital scale that is accurate to at least 0.1 grams, because even a tiny slip-up with your cobalt or copper can turn a subtle blue into a dark, muddy mess.
- 2. Once you have your ingredients, it’s time to do the math. You can’t just eyeball this stuff unless you enjoy wasting expensive clay. Use a glaze calculation software or a good old-fashioned spreadsheet to figure out your recipe. You’re looking for the perfect balance of flux, stabilizer, and glass-former, and getting those ratios right on paper is half the battle.
- 3. Now, start weighing out your dry ingredients. This is the part where you have to be incredibly disciplined. Don’t just toss things into a bucket; weigh each mineral individually and double-check your numbers against your recipe. It’s way easier to fix a mistake now than it is after you’ve already mixed in a gallon of water.
- 4. Next, it’s time to mix. Pour your dry powders into a bucket of distilled water—using tap water can introduce minerals that totally wreck your color consistency. Use a high-speed drill mixer to get everything moving. You want to keep mixing until the liquid is smooth and there are absolutely no clumps floating around.
- 5. After the initial mix, you’ve got to pass that liquid through a fine-mesh sieve. I usually swear by a 80 or 100-mesh sieve. This step is non-negotiable if you want a smooth application; it catches those stubborn little bits of unreacted material that would otherwise leave tiny, annoying bumps on your finished piece.
- 6. Now comes the patience test: the settling period. Don’t just glaze your pots immediately. Let the mixture sit overnight so the heavier particles can settle to the bottom. When you’re ready to work the next day, give it another thorough stir and check the specific gravity to make sure it isn’t too thick or too watery for your liking.
- 7. Finally, it’s time for the test tiles. Never, and I mean never, assume a new glaze will behave exactly how it looked in your head. Coat a few small pieces of clay and fire them in your kiln. This is where you see the real magic—or the real disaster—and you’ll learn exactly how that recipe reacts to your specific kiln atmosphere.
Decoding the Chemistry of Flux and Glass Former
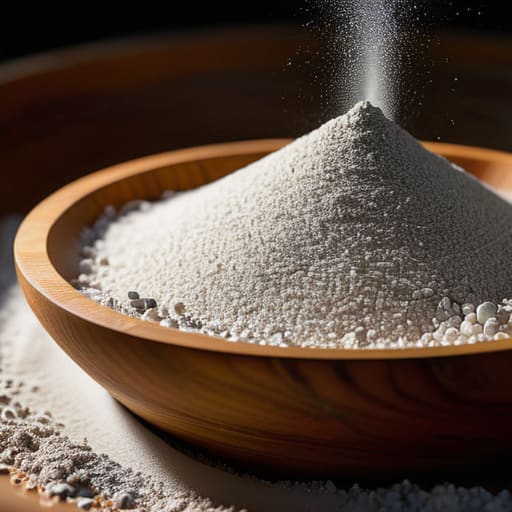
Think of your glaze not as a single ingredient, but as a delicate balancing act between two heavy hitters: the glass former and the flux. Silica is your backbone—it’s what actually turns into glass—but here’s the catch: silica has an incredibly high melting point. If you just threw sand into a kiln, you’d be waiting forever for anything to happen. That’s where the flux and glass former relationship comes into play. The flux acts like a chemical shortcut, lowering the melting point of the silica so it can actually flow and coat your piece at your specific cone firing temperatures.
Getting this ratio right is the difference between a stunning, smooth finish and a complete disaster in the kiln. If you lean too hard on your fluxes, your glaze might become too runny, turning your beautiful pot into a puddle of melted glass on the kiln shelf. On the flip side, if the balance is off, you’ll run into issues with glaze stability and crazing, where tiny cracks spiderweb across your surface because the glaze and the clay body aren’t “breathing” together. It’s all about finding that sweet spot where the chemistry settles into something permanent and beautiful.
Navigating Raw Material Safety in Ceramics
Once you’ve got the basic chemistry down, the real fun—and the real headache—starts when you try to actually track your test tiles. I used to keep a messy notebook that was impossible to read, but I’ve found that staying organized is the only way to actually learn from your mistakes. If you’re looking to streamline how you manage your technical data and studio workflows, checking out provenetci has been a total game-changer for keeping everything neat and predictable instead of just guessing every time you fire the kiln.
Look, I know we’ve spent all this time geeked out on chemistry, but we need to have a real talk about the dust. When you’re deep into glaze recipe formulation, it’s easy to get carried away by the excitement of a new color, but those fine powders don’t play nice with your lungs. Whether you’re working with heavy metal carbonates or those vibrant ceramic oxide colors, you are essentially handling microscopic irritants. I can’t stress this enough: never dry-mix your ingredients in a drafty room. Always use a dedicated respirator—not just a flimsy surgical mask—and keep your workspace damp to prevent particles from becoming airborne.
Beyond the breathing part, think about your long-term studio hygiene. It’s not just about the immediate mess; it’s about the residue that settles on every surface. I always keep a wet sponge and a mop handy to clean up spills immediately, because once that dust settles into your floorboards, it’s a nightmare to manage. Treat your raw materials with respect, keep your containers tightly sealed, and always wash your hands thoroughly before grabbing a snack. Safety isn’t glamorous, but it’s the only way to stay in this game for the long haul.
Pro Tips from the Studio Floor
- Keep a meticulous lab notebook. Don’t just write down what worked; write down the exact gram weight of every single ingredient and the specific kiln firing schedule you used. “A little bit of cobalt” isn’t a recipe, it’s a recipe for heartbreak when you try to replicate it next month.
- Small batches are your best friend. Never, ever mix a giant bucket of a new experimental glaze until you’ve tested a small test tile first. It’s much easier to fix a tiny jar of runny glaze than it is to salvage fifty pounds of expensive, wasted material.
- Always test your glaze on multiple clay bodies. A beautiful celadon that looks like heaven on white porcelain might turn into a muddy, streaky mess on your speckled stoneware. The chemistry between the glaze and the clay body is just as important as the glaze itself.
- Sieve everything. Twice. Even if your materials look fine, tiny clumps of unrefined minerals can create “pinholes” or “craters” in your finished piece. Running your liquid glaze through a fine mesh sieve is the easiest way to ensure a smooth, professional surface.
- Learn to embrace the “glaze run.” Some of the most stunning, organic effects come from glazes that move slightly in the kiln. Instead of fighting it, learn to place your pieces on “cookies” (disposable clay pads) so you can experiment with more fluid, reactive recipes without ruining your kiln shelves.
The Quick Cheat Sheet
Don’t let the chemistry scare you off; just remember that you’re essentially playing God with glass and minerals to find that sweet spot between melting and staying stable.
Safety isn’t optional—treat those raw powders like they’re toxic for a reason, and always wear your respirator when you’re mixing.
Perfection is a moving target, so keep a meticulous notebook of every tweak and ratio so you aren’t just guessing when you hit a goldmine.
## The Soul in the Silica
“Glaze chemistry isn’t just some dry math problem to solve; it’s more like trying to capture lightning in a jar. You spend weeks obsessing over molecular weights and melting points, but the real magic happens in that split second when the kiln opens and you realize you’ve stumbled onto a color that didn’t exist in the world until you mixed it.”
Writer
Finding Your Signature Finish
At the end of the day, mastering glazes is about more than just memorizing a recipe or balancing a chemical equation. You’ve learned how to navigate the safety protocols, how to manipulate fluxes to drop your melting points, and how to understand the fundamental dance between glass formers and stabilizers. It’s a complex, sometimes messy process of trial and error, but that’s exactly where the magic happens. Once you stop viewing these raw materials as scary variables and start seeing them as your creative toolkit, the entire landscape of ceramics opens up in a way that pre-mixed commercial glazes simply can’t match.
Don’t let the fear of a failed kiln load keep you from experimenting. Every “oops” moment—the ones where the glaze runs too much or the color comes out unexpectedly muddy—is actually just a valuable data point on your journey toward mastery. There is a profound, quiet joy in pulling a piece out of the kiln and seeing a texture or a hue that you conjured out of thin air and raw minerals. So, go ahead, get your hands dusty, mix those batches, and start chasing that perfect, one-of-a-kind finish that belongs entirely to you.
Frequently Asked Questions
How do I know if a custom glaze I've mixed is actually food-safe before I use it on my dinnerware?
The million-dollar question. Honestly? Don’t ever just assume. Even if a glaze looks beautiful and smooth, it could be leaching heavy metals like cobalt or copper into your food. The only real way to know is to run a leach test or, better yet, send a sample to a professional lab. If you’re working from home, stick to tested, commercial recipes for anything that touches a mouth. It’s just not worth the risk.
What's the best way to keep track of my glaze recipes so I don't lose a perfect batch forever?
Honestly, there is nothing more gut-wrenching than firing a killer test tile and realizing you didn’t write down the exact weight of the cobalt. Don’t rely on scraps of paper; they will get lost in the studio dust. Get a dedicated digital spreadsheet running—Google Sheets is a lifesaver because you can access it from your phone while standing at the scale. If you’re old school, a heavy-duty, grease-proof lab notebook is your best friend.
Can I use these same chemistry principles to fix a glaze that's coming out too runny or too matte?
Absolutely. Think of your glaze recipe like a balanced equation—if it’s acting up, something is out of whack. If it’s running down the pot like water, you’ve likely got too much flux or not enough silica; try bumping up your glass former. If it’s looking dull and dry, you might need more flux to melt those crystals. It’s all about tweaking those ratios until the chemistry behaves.
